FREE shipping for all orders above R1000
0 Cart
Added to Cart
    You have items in your cart
    You have 1 item in your cart
      Total

      Reviews — Camera

      Tomtom’s Take On The Action Camera

      Tomtom’s Take On The Action Camera

      Over the last few years, the term action camera evolved exponentially, and has now become a buzzword for all sport enthusiasts. Whether you are a weekend warrior, or professional athlete, it is now a trend to have an action camera, and capture your chosen sport. It has almost become more important to film and share the experience as it about the sport itself.

      This evolution of action cameras pushes manufacturers to come up with new and better products.  This is great news for us, as we, the end user, now have a choice of cameras to choose from with competitive pricing.

      This manufacture war has brought us the TomTom Bandit, TomTom’s take on the action camera. At first glance, this camera scared me a little, as I, and many others, are used to seeing the small square look of the GoPro and now suddenly I was presented with a long white and red tube. 

      Having used GoPro’s for several years now, I expected the bandit to compete directly with the GoPro, by either copying the menu system or mountings. But I was happily shocked to discovery that they redesigned the whole camera to suit their needs and look, which excited me.

      So let get started from the top.
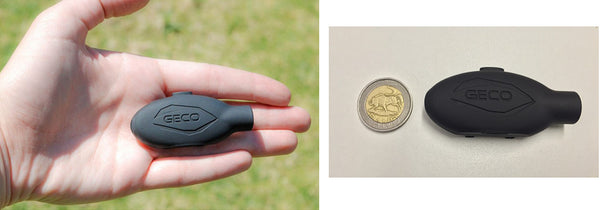
      External Design:

      At first glance, you can see that TomTom put some time in designing the product, which encouraged me to play and figure it out. I like the buttons above and below the LCD, and I appreciate the size of the LCD. The LCD however is not for viewing, but remains only for the menu system.
      Below the camera, TomTom have completely redesigned the mounting bracket. It is incredibly easy to clip the camera on and off their mounts, including the mount that screws into the GoPro accessories. However, this mount does need some work, as it tends to sit a little bit loose, which entail, allows the camera to shake ever so slightly.

      There is an easy to press record button at the butt end of the camera, and a water resistance lens cap at the front of the camera.

      The camera out of the box is not water proof, but this can be changed simply by changing out the front lens cap, which makes me think why they didn’t release the camera standard with the under water lens cap.

      Menu System:
      Man, well the Menu system shocked me at first, as TomTom have really gone out their way to design what they believe is a user friendly menu control. After a few minutes of playing around, I finally understood what they had done and found it rather pleasing. So if you purchase this camera, just be patient and go through the menu in detail to figure it.

      I really like how they have brought a whole new way of going through a menu, and when you get used to it, you can move around the cameras menu easily and fast.

      Video & Sound Quality:

      So comes the million-dollar question, what is the quality like? Well this was my immediate worry, and I was pleasantly happy to learn that the quality is surprisingly good.

      The camera shoots 4k, 2.7k, 1080 50/25 AND 720 100/50. The 4k image  however only at 15fps, so this is not usable, so I set the settings to 2.7k at 25fps and went out on a test shoot and filmed with a friend on his dirt bike. Upon reviewing the footage, I was blown away at how clear the image was, and how vibrant the colours were.

      The onboard sound when the camera is static is what I would expect, clear and loud, however, when the bikes were riding, the wind took over and I was left with a video that had massive noise levels and was unusable for the edit.

      The App:

      Absolutely amazing, the dedicated app for the TomTom Bandit blew my mind and just made me want to play more with my camera. When it comes to apps and action cameras, TomTom got it right, and this is something that will set them apart from their competitors.
      The app boasts ‘Easy Editing In Minutes”, and its exactly that, they did it right and it shows. The menu has a fully integrated editor for you to create a short video after a long day of filming. The app also has tags for when you received high G-forces, or simply jumped or moved around, or for those funny moments, if you fell, the camera will detect that sudden change of speed and tag it, allowing you to find that moment in a long recorder in seconds.

      With the app, you also have access to the GPS co-ordinates, G-force detector, your heart rate, and altitude. To use the heart rate monitor function, you need to make an additional purchase to sync the camera to your body.

      Conclusion:
      I am happy to say that TomTom brought out a camera that really surprised me, and exceeded my expectations. The camera has fantastic video quality, amazing photographs and the app, well the app is just incredible. This is definitely a camera worth getting, especially if you don’t own a gopro or any other action cam.
      If you want a camera to film with and take photos, but don’t have the time to edit a video on your computer, this is for you, the TomTom bandit is all of that in one unit. If you are a professional videographer and require top quality video and the ability to set you ISO, White balance and colour grade, then stick to the GoPro, but don’t root out the advantages of the Bandit, such as the telemetry you can use in your next edit.

      Dislikes:
      Straight away, I don’t like that I cannot change the battery, because I could be on a long trip and have limited access to recharging my device, and have no other solution to stop filming and charge my device.
      The video settings don’t allow you to change your ISO, White balance, or colour profile, which is a requirement for the professional industry. 

      Osmo – Steadying the Planet

      Osmo – Steadying the Planet

      By Dave Estment - professional photographer

      It never ceases to amaze me how brilliant new technologies are born, grow very slowly until someone realizes the full potential of the new technology, and then all hell breaks loose. A classic example of this is the combination of two fairly new technologies, which OV&P has adopted in our quest to remain at the cutting edge of our industry.

      Drones have revolutionised the film and photographic industries with their compact sizes, maneuverability and the ability to provide whole new perspectives to audiences, irrespective of the genre or subject matter being shot. What a lot of people may not be aware of is that drones would be completely useless in these roles if they did not have a secret element attached to them to provide dead steady footage and photographs – taking vibration, any destabilising movement and strong winds out of the equation.

      The secret element is a 3 axis, computer controlled gimbal that has complex algorithms and GPS based positioning tech built into it to cancel out the movement caused by the above factors. We love this new technology and it now forms an integral part of our offering. The size and weight of these incredible bits of kit is of paramount importance, particularly on drones, due to the direct relationship between battery life and the total weight of the craft. The smaller and lighter the better, each gram of saved weight contributing to the battery life and therefore airtime achieved by the drone.


      This technology has now found its way back onto the ground in the form of hand-held gimbals to mount various sizes of cameras depending on the application for the shoot. We have added two hand-held gimbals to our arsenal of gear, both manufactured by the same brand we use for our drones, which is global industry leader DJI. The two models are known as the OSMO and the RONIN-M.

      The OSMO uses the same camera we use on our drones which is capable of full 4K video and RAW photographs built onto the same gimbal, providing unbelievably steady footage for action sequences, in a tiny package. We used it in a few scenarios this past week while on location again at Ant’s Nest & Ant’s Hill game reserve, so stay tuned for more on the second promo video we are creating to highlight the stunning horseback safaris that they offer.

      The RONIN-M (OSMO’s big brother) is heavier and designed to work with bigger cameras, providing Hollywood quality, rock steady footage, but the downside is that the operator needs to have strong shoulders as the RONIN gets very heavy after a couple of minutes of high action running and jumping around :) It also comes with a relatively high price tag. By contrast, the OSMO is really light in weight, as well as life changing for enthusiasts and professionals as it is reasonably priced, making it more accessible and enabling world-class footage, which five years ago would have cost a small fortune.

      Thank you DJI.

      How the TomTom Bandit Differs from the Gopro

      How the TomTom Bandit Differs from the Gopro

      By Wouter du Toit


      I recently had a good conversation with Jack Parow about the gear he uses when on tour. The one item he kept coming back to was the TomTom Bandit Action Camera so I did some research. I was quite impressed, and you might think that it's just a competitor to the action cameras like Gopro's range, but you'll be quite surprised when you see what this camera has to offer. It’s a much more automated experience than the Gopro workflow. The action camera market has been dominated by the likes of Gopro since the niche action camera market grew into the commercial entity it is today, with professional teams increasing their production value by being able to mount a camera anywhere they want. Let’s compare the Bandit with the Gopro to see where the improvements are.

      How the TomTom Bandit Differs from the Gopro

      Just like the Gopro the Bandit captures 4K video. It captures the whole shoot - with an optional addition of a 3 hour battery which is double that of the Gopro Black, and edits all the highlights of the shoot into a powerful video automatically. So let’s see how this works:

      Firstly, you get the heart rate monitor that syncs with the camera. After a shoot session, you literally shake the camera and it edits together a movie of all the shots where your heart rate was above average. So, in essence, all the best parts of your footage is put together in an instant, shareable video.

      This is quite a big deal, especially if your time is limited. Jack Parow can't have videos edited the day or week after a show. It has to be loaded up socially the same day of the event. The auto-edit makes it much easier than scrubbing through footage to put together a video.

      Highlights:

      • It has sensors for Speed, G-force, Altitude, Rotation and Heartbeat and you can set it up for each of these sensors.
      • It has mounts just like the Gopro, and also a mount that fits onto GoPro mounts, so you can easily interchange which cam goes where if you already have a Gopro cam.
      • It shoots 4k video
      • It can shoot for 3 hours with a cable free battery pack.
      • A Remote Control, Handlebar Mount, Pole mount, 360 Pitch Mount, Power Cable can be added to your kit.
      Where will you use it other than getting on stage in front of thousands of people? It really depends on how adventurous your life is. You can use it when biking, trail running, skydiving, cycling, or anywhere you want. The aim is to get one, and to get out there.

      John-Michael tests out the World's lightest Action Camera

      John-Michael tests out the World's lightest Action Camera

      By Brad Edwards AKA Fuzz

      At only 20 grams, the Geco Mark II is the world's lightest action camera. Made in South Africa, the Geco is one of the simplest, smallest and most practical camera's on the market. Designed to mount to the frame of your glasses, you will be able to film life's spontaneous moments in HD while still having the chance to experience them. The Geco is able to film in 1080p30, 720p30 or 720p60, which saves to a nifty removable 8GB MicroSD card included.in. The 300mAh battery will give you between 45minutes and an hour of film time between charges, and can record while charging if you've got a powerbank.

      One of the great features of the Geco is it's versatility and there are just some things where the angle and point of view you wished you could get were just not realistic. Being only a little bigger than a 5 rand coin and a tad longer, it can be mounted simply and feels like nothing's there, or placed in its 30m waterproof case and mounted to any 1/4 inch standard camera mount. It can also be used as a dash cam or webcam.

      The Geco can be used in pretty much anyway your imagination can come up with and being at a fraction of the price of other HD action cameras on the market at recommended retail of R2000, it's a lot less stressful on your pocket to share great footage.


      John-Michael national MTB cyclist and Action Gear Buyer tested the Geco Mark II out with a ride through Detla Park, which shows the quality of video at high speeds. This video was shot by John-Micheal alone with no help, using the accessories and tripod that come with the Geco in the box. One of the coolest parts for me was that I purely cut the videos into one video with YouTube's editor. There are no filters, enhancements or stabilization added. YouTube even had a choice of rad free music options to give the video a little Oomph.

      Hit that HD! - Head to Action Gear to see the full specs on the Geco Cam!

      Quick and easy, from recording to posting. Here it is, after a video about the geco.

      Here's what John-Michael recorded through Delta Park.


      Kloofendal Nature Trail Review

      Kloofendal Nature Trail Review

      By Terence Vrugtman

      Kloofendal is a small nature reserve in the middle of Roodepoort. The reserve used to be well known for its functional amphitheater and animal shows on the weekend. It's the perfect small and quint escape from the city and offers 8km's of trail in total. While it may not the longest of trails, it is certainly not short on quality. In additional to its trails, Kloofendal has well maintained picnic benches and ablutions. The trails are split into 3 main routes, joining 2 of them together makes for a nice 5km route suitable for anyone!


      Is it for beginners? Yes!


      The reserve offers a true trail experience without forcing you out of your comfort zone. It features both easy to run single tracks and technical bits to train the eyes and feet. Its amazing views and hills are just the right size for anyone. I like to use the route as a weekly time trial to monitor my improvements and wake up the legs for the week's running ahead. As you progress you can add in another 2km of trail to mix things up.


      Is it for Elite Athletes? Yes!


      The technical section along the trail allows for great training. A smooth and easy trail ideal for the faster training sessions and the route is often empty allowing for intimate moments between you and your mind. If the 5km lap isn’t enough, Strubens Ridge is across the road and is ideal for hill reps!

      Route Description:


      Start at the information board, run around ‘Planet Walk’ and the picnic tables as a short warm up. Make your way through the south west gate and into the reserve. Make sure you close the gate, from there follow the Red route markers leading you up the single track towards the south west side of the park. Follow along the pylons and cross the broken concrete bridge over the dried stream. Tackle the first of 3 the nice hills, as you get to the top a slight left reveals the second of the 3 consecutive hills. Once at the top, you would have climbed a total of 100m in 1.5km. The trail then leads downhill towards the 3rd hill. Thereafter you can have fun on the ‘sprint section’. The sprint section is an awesome flat-ish technical piece of single track that encourages you to bolt as fast as you can. The contoured single track lead has an amazing view of Kloofendal and the surrounding areas. The end of the sprint section introduces a long downhill I call ‘Mini’ Rockeries’. After running under the pylons for about 200m you break off the trail left heading further down until a sudden right turn towards the stream. It’s a technical crossing and then a slight hill, after the crossing take an immediate left and following this track till the next pylon. Just before the Pylon you turn right again, the trail becomes more technical as you go along. Finally the trail heads north after a tricky rock section and leads you into a forest type section. Follow the blue markers and you won’t get lost. As you exit the final gate you will notice you have finished right back where you started at the information board.


      The trail is 5km and has an extra loop if you want to make it longer.


      Additional Notes:

      • There is secure parking,
      • The venue is secure and well maintained,
      • There is not drinkable water along the route, so make sure you're prepared,
      • There are buck, hares and dassies to see along the trail,
      • Bring your own toilet paper for the toilets,
      • Keep the trail clean, how you found it, leave only footprints
      • The trail is great training for the Spring Break Trail Run, in September,

      Get on the Trail and share your thoughts - @TVrugtman